All You Need to Know About Planting Garlic In Fall
Planting garlic in the fall may seem counterintuitive but it’s actually the best way to ensure a plentiful crop the following year. Here is everything you need to know to plant garlic in the fall successfully.
Save This Page
Planting Garlic In The Fall
It’s time to plant our fall garlic crop for a bountiful harvest next summer.
Timing is essential; aim to plant it 4-6 weeks before your region’s first expected frost date. This timing allows the garlic to establish strong roots before winter.
That said, your garlic will grow even if you plant it late.
We’ve planted after the frost date before and still gotten a healthy crop. Garlic is a hardy plant.
Just get it in the ground.
Soil preparation is crucial.
Garlic prefers well-drained soil with good organic matter. Incorporating compost on top of or into the soil can enhance its fertility and structure, providing an ideal environment for garlic growth.
When selecting garlic bulbs for planting, ensure they are healthy and free from disease. You can obtain bulbs from a garden center or use bulbs saved from a previous harvest.
We hold back half the harvest from each crop every year.
Plant garlic cloves individually, with the pointed end facing upward. A depth of about 1 to 2 inches is suitable, and spacing cloves 4 to 6 inches apart in rows with 12-inch row spacing is recommended.
To protect the garlic during the winter, apply a layer of mulch, such as straw, hay, or leaves. This mulch helps insulate the soil and prevent temperature fluctuations.
We use a layer of compost as mulch followed by whatever organic materials we have.
Water the newly planted garlic cloves thoroughly to settle the soil around them. Garlic will establish roots during the fall and then go dormant over the winter.
In the spring, as temperatures rise, garlic will begin to grow. Continue to care for it by providing consistent moisture and monitoring for any signs of pests or diseases.
Garlic is typically ready for harvest when the lower leaves turn brown, usually in late spring or early summer.
Understanding Your Growing Season and Frost/Freeze Dates
As most of the garden is being put to sleep for the cold winter season ahead — garlic is just getting ready to begin its journey.
You may currently be trying to speed-ripen your tomatoes or planting tillage radish as a cover crop to improve poor soil — better plant some garlic while you’re at it.
Depending on your particular location, garlic should be planted about 4-6 weeks before the soil starts to freeze for winter.
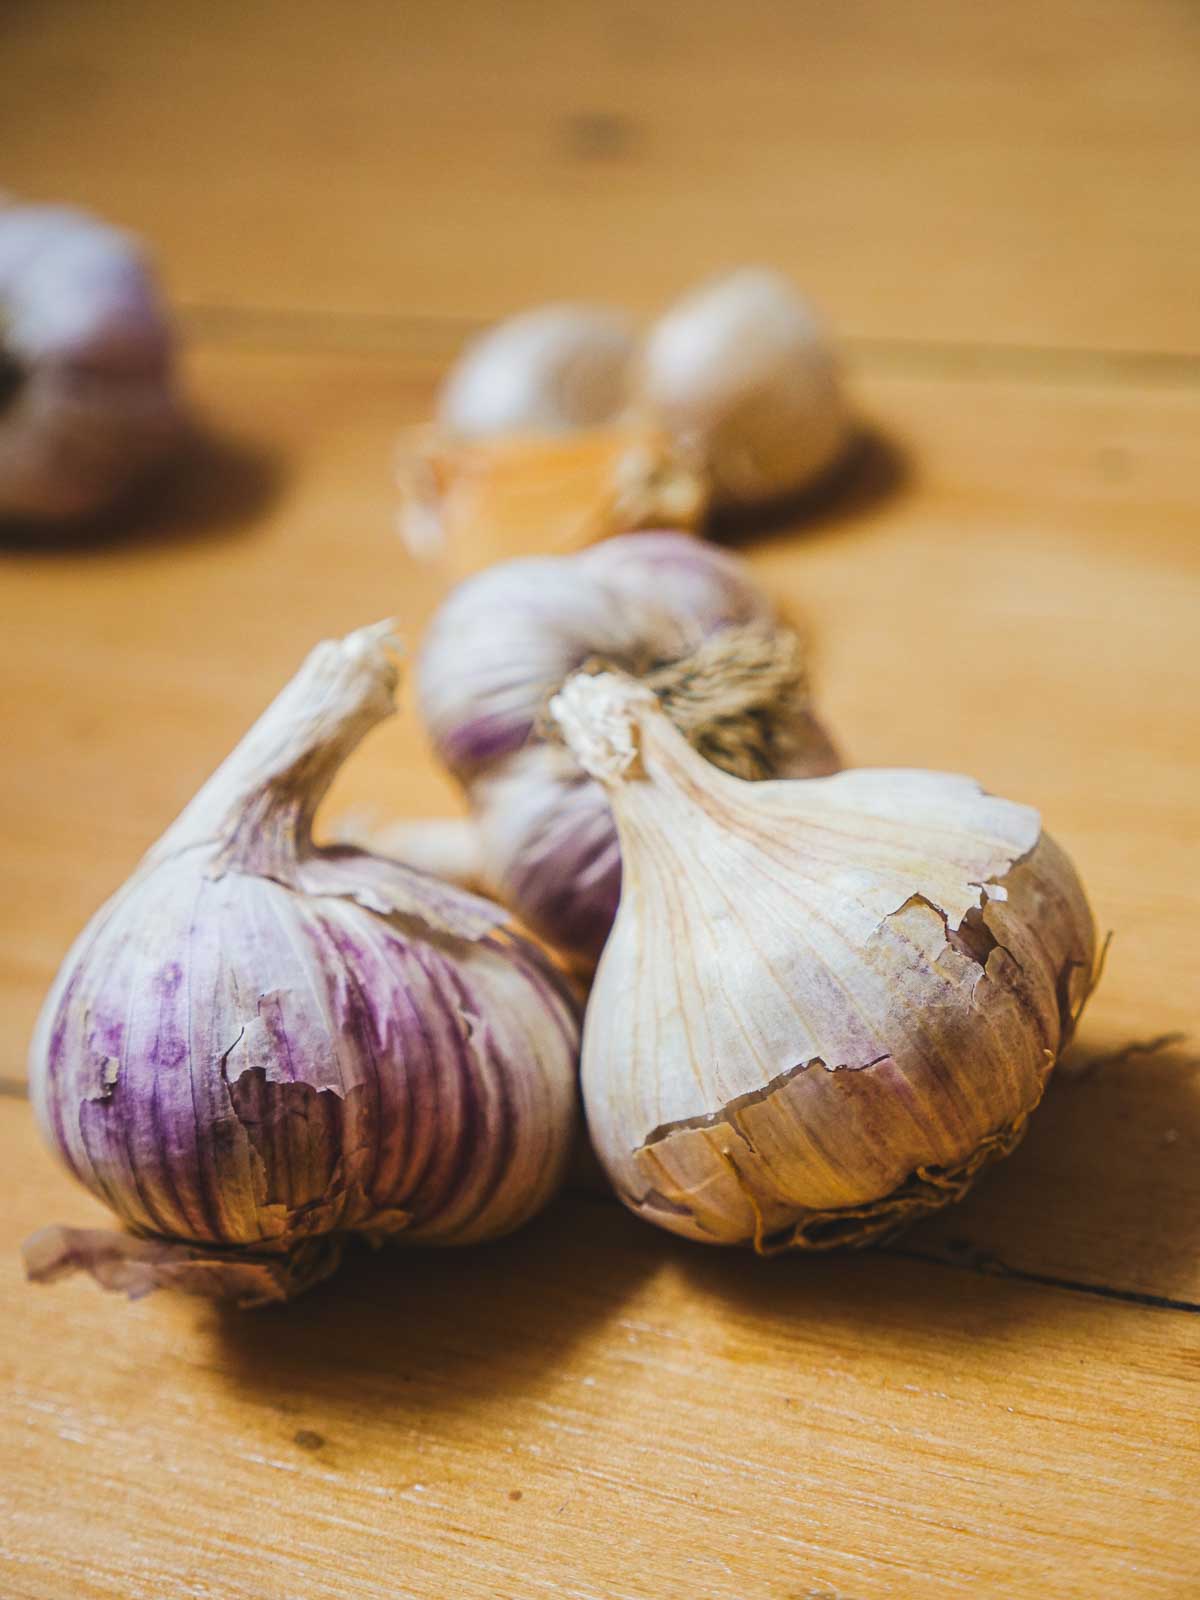
Choosing Garlic To Plant
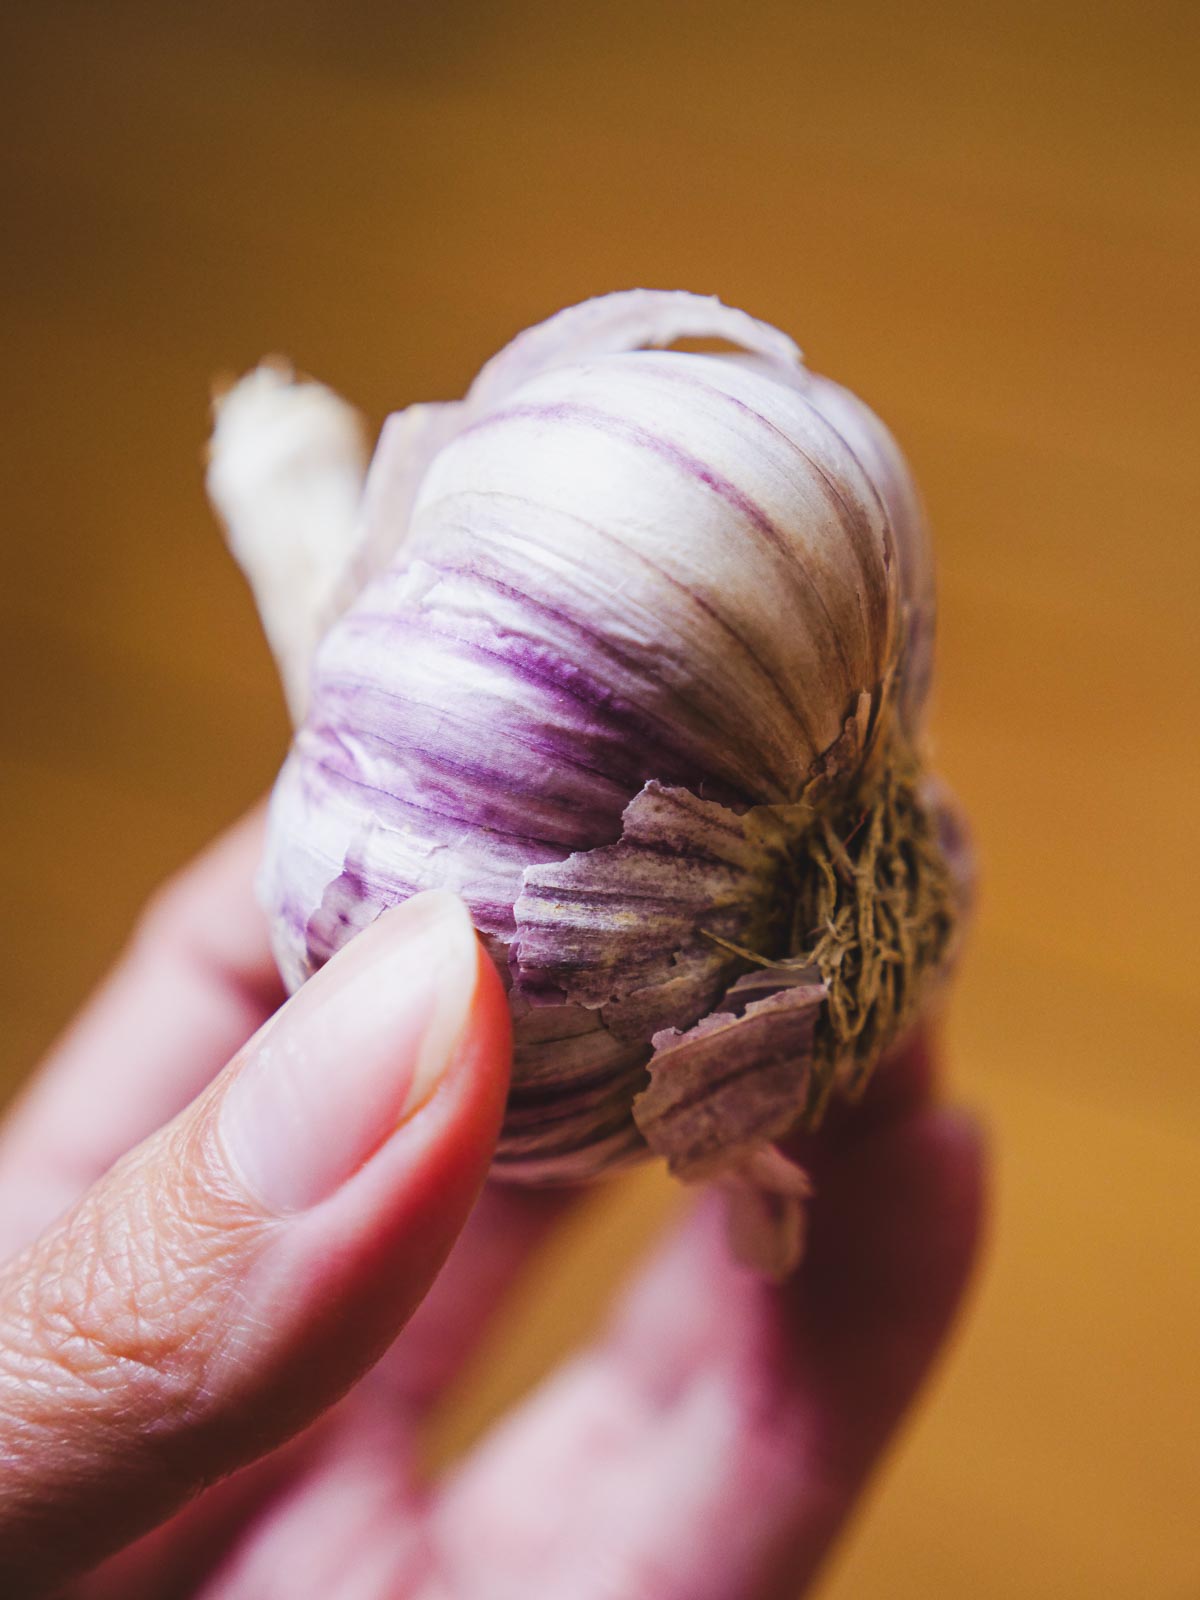
When planting garlic in fall, the most important thing to consider is choosing the best, healthiest, and most robust seed garlic. You want bulbs with an intact, tight, papery wrapper holding the cloves firmly and neatly.
Do not plant garlic seeds from bulbs that are splitting open, as you will, in turn, grow more garlic with those unwanted characteristics.
Try to find the largest cloves possible. Large cloves are so much easier to peel and work with when cooking.
I hate peeling and chopping teeny tiny cloves, so I prefer not to grow more.
Where To Buy Seed Garlic
Shop local if possible as that will likely be your locale’s stiffest and best choice.
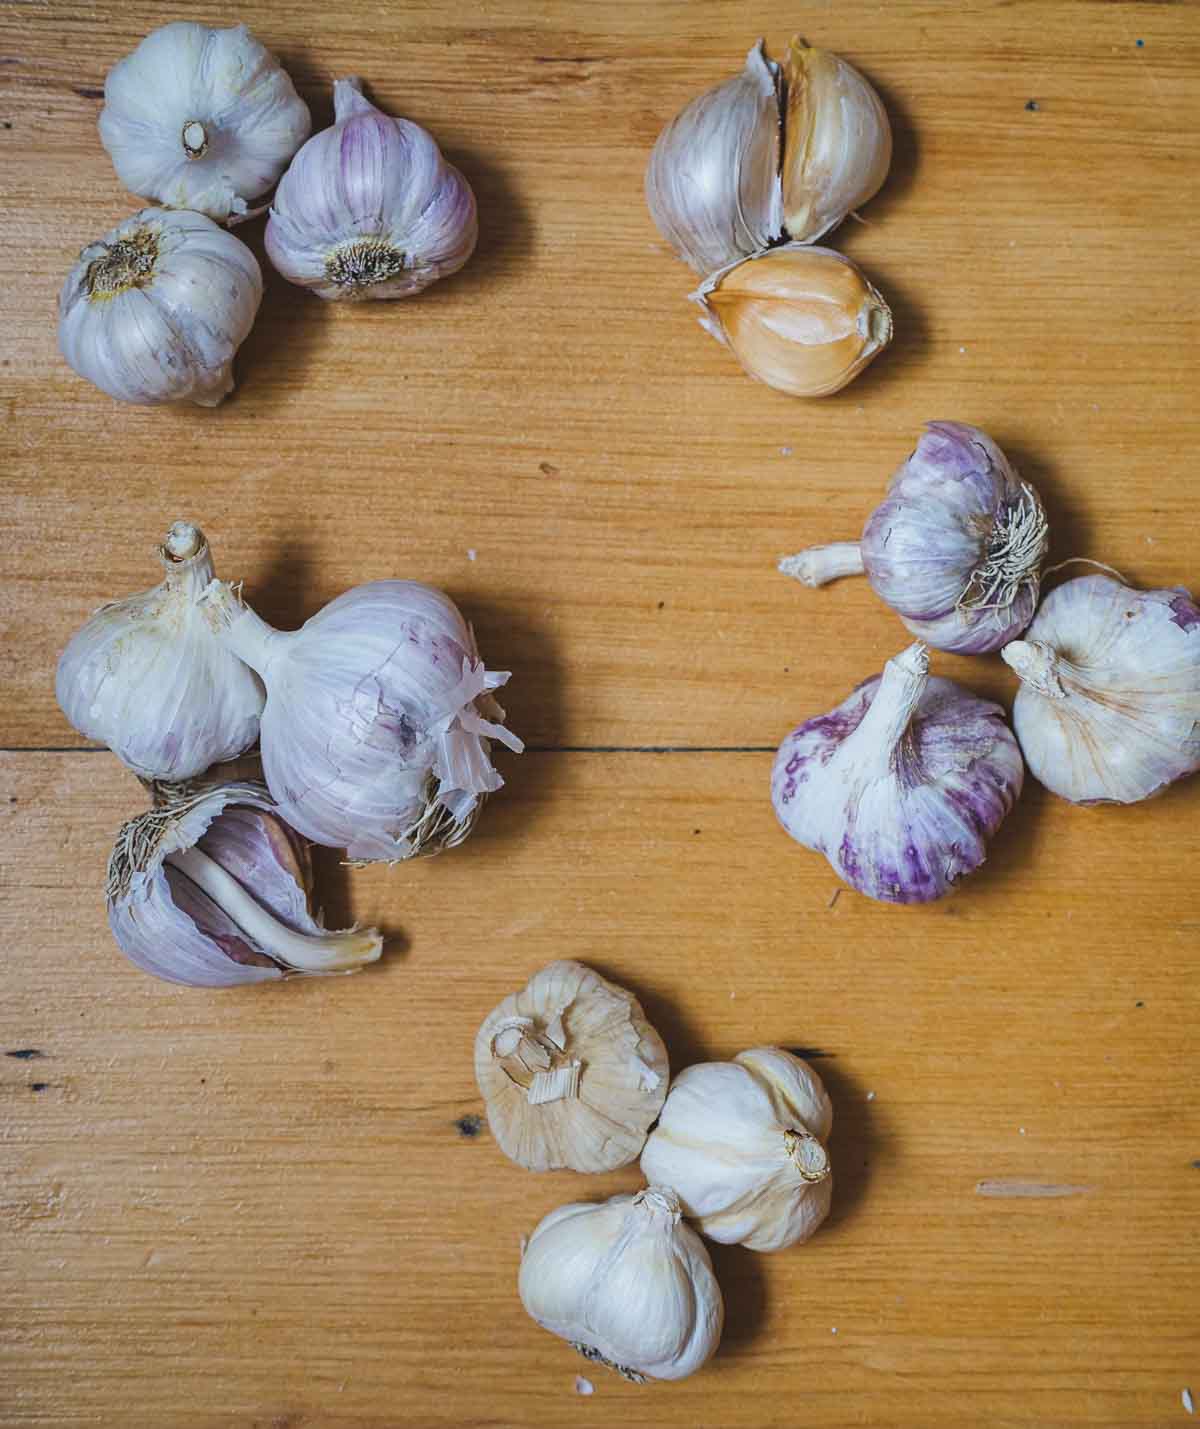
Did you know that there are more than 200 varieties of garlic? You must choose a variety that suits your region, climate, and taste.
I highly recommend finding hardneck garlic seed.
Start your search locally and find high-quality seed garlic.
Eventually, you can build up your own successful strain from careful selection and planting of your own year after year.
Preparing Your Garlic Bulbs For Planting
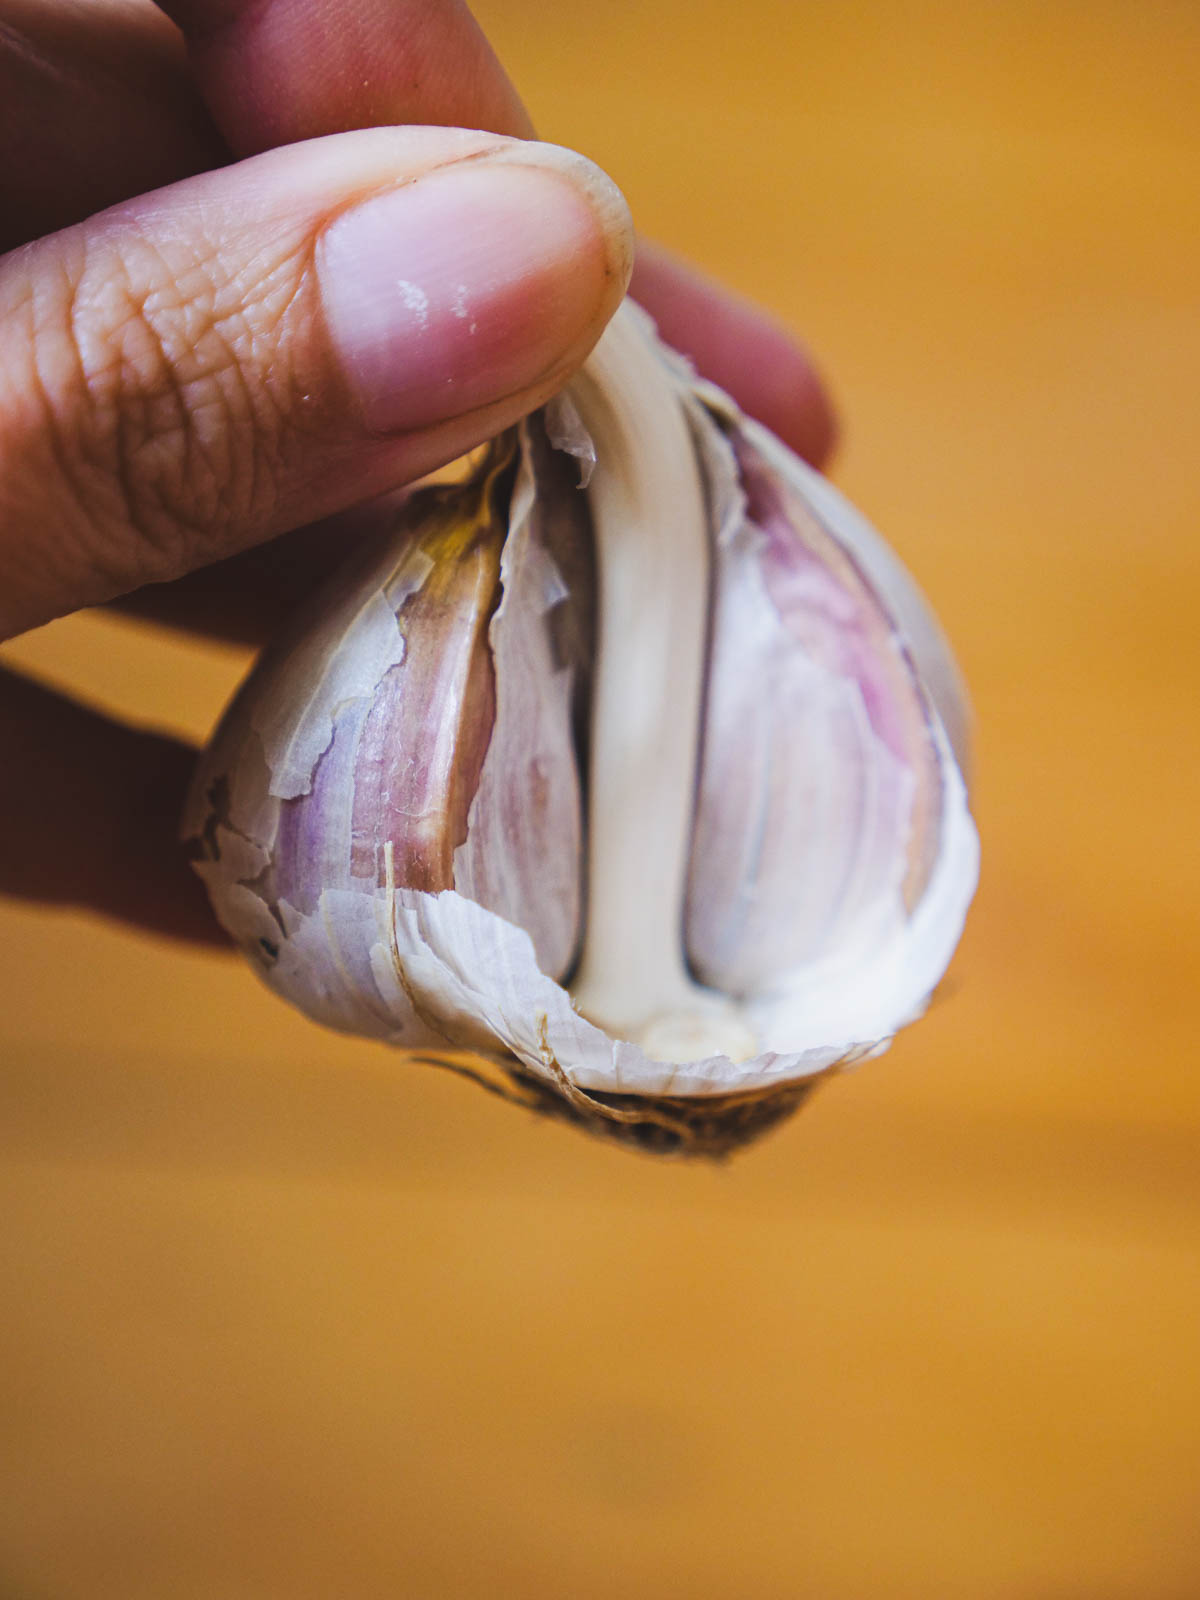
Preparing your bulbs for planting in the fall involves peeling the outer paper husk while keeping the inner garlic peels intact.
Assuming you cook with garlic, this is pretty self-explanatory — gently peel off the outer layers and separate the inner cloves while leaving their protective husks alone.
You can now soak the cloves for 20 minutes right before you’re going to plant them.

Preparing Your Garden Bed For Planting Garlic In The Fall
Prepare your garden beds in the fall before planting.
Garlic thrives in rich, well-drained soil and in areas that receive total sun exposure.
You will want a bed that is free from tree roots or rocks.
Add compost.
Choosing a bed that can be rotated with something else the following year is also best. Rotating your garden beds can reduce the chance of pests and diseases taking hold.
When ready, plant your garlic about 3 inches deep (in cold areas like where I am in Canada) or only about 1-2 inches in milder climates.
Plant the individual cloves 3-4 inches apart and set your rows about 6-8 inches apart.
If you have poor soil, allow for more room, a couple of inches or so.
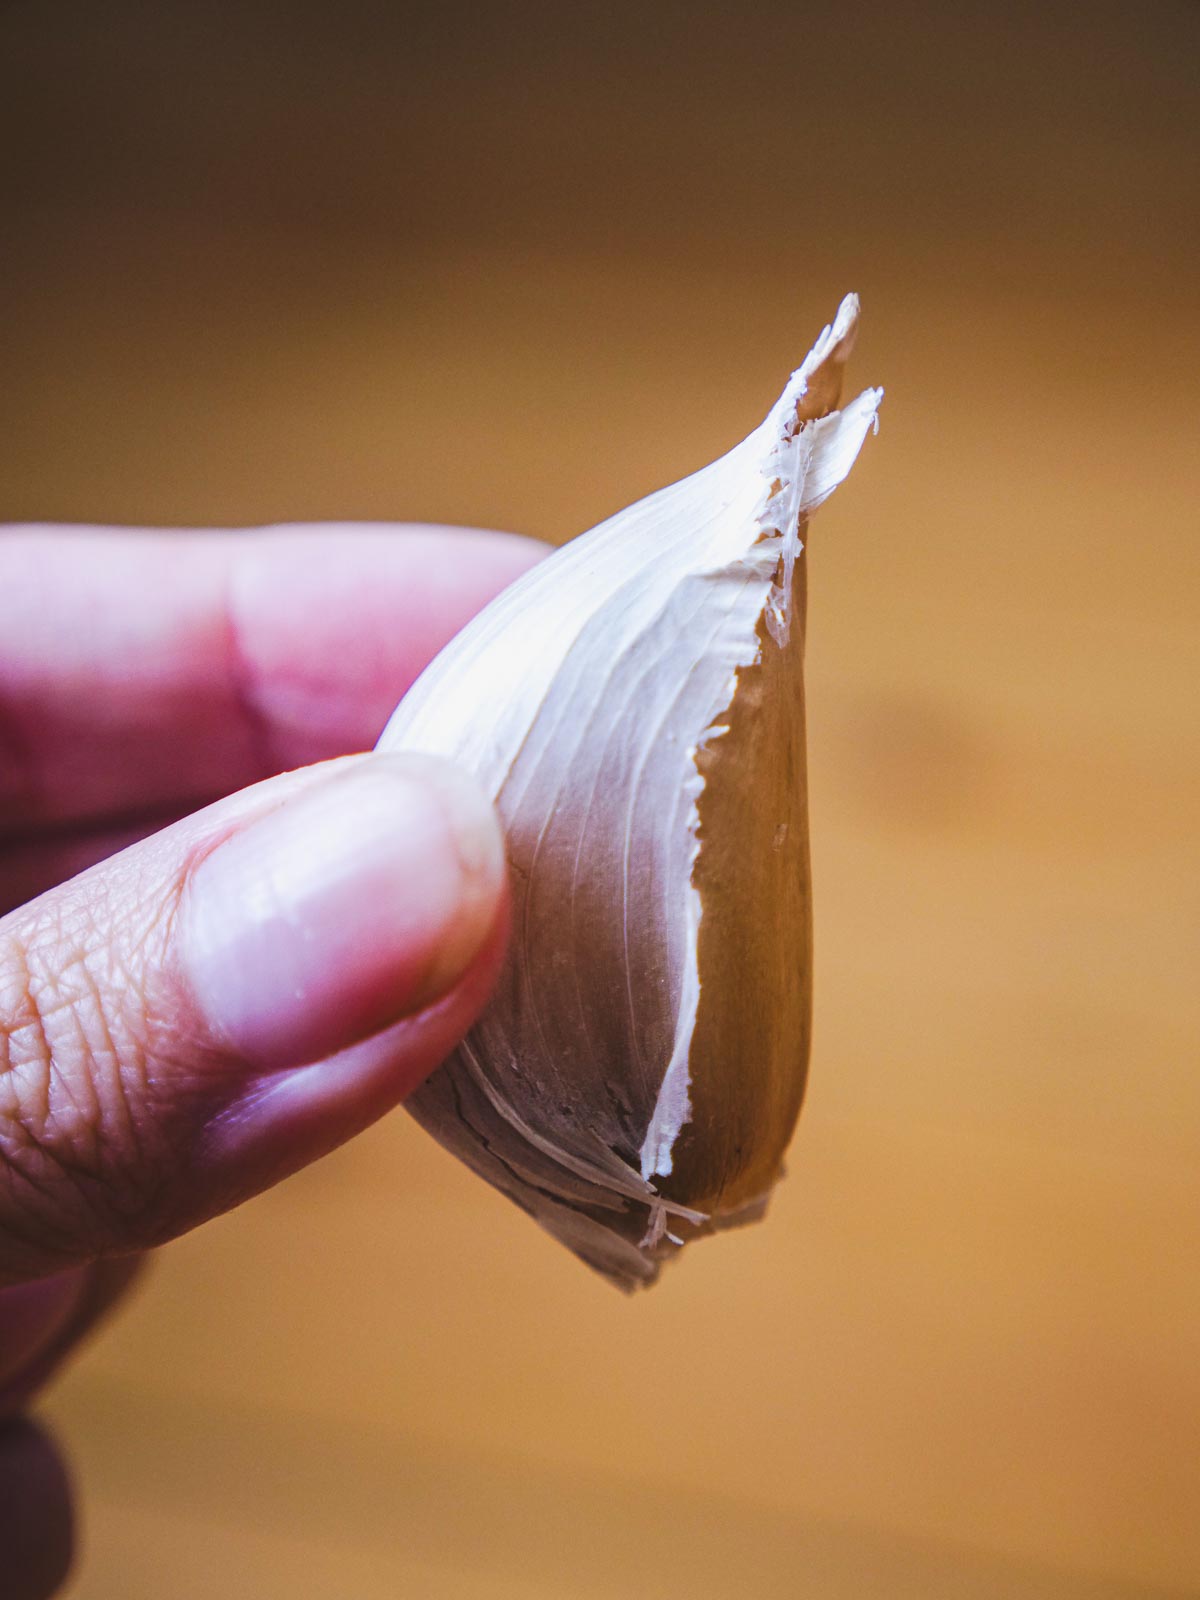
Above is the correct orientation for your garlic to be planted successfully.
It is vital that when planting garlic, you plant root side down and stem side up.
Garlic that is planted the opposite way might not grow at all, but if it does, it will likely be small, stunted, and deformed.
See the image above for reference — that is how you need to plant your garlic.
This is not true for soft-neck garlic — the garlic you most likely find in your grocery stores that have been planted mechanically.
But soft-neck garlic simply does not taste as good as hardneck, which I love the most and highly recommend you seek out.
Once you have planted your garlic, cover it with a thick bed of straw or other organic mulch.
If you are concerned about straw containing numerous weed seeds you will have to contend with come spring — get chopped straw like the type used for chicken bedding. You will not have to worry about weeds or other random accidental seeds.
And that is really all there is to it.
The garlic cloves you planted will begin to sprout before the harshness of winter really sets in and continue in the spring when the temperatures warm up and the soil begins to thaw and warm up too.
As the garlic grows in earnest, keep the bed mulched and weeded come springtime.
Water it lightly as the soil dries out, but only as necessary. Over-watering can rot the garlic.
Harvesting The Garlic Scapes
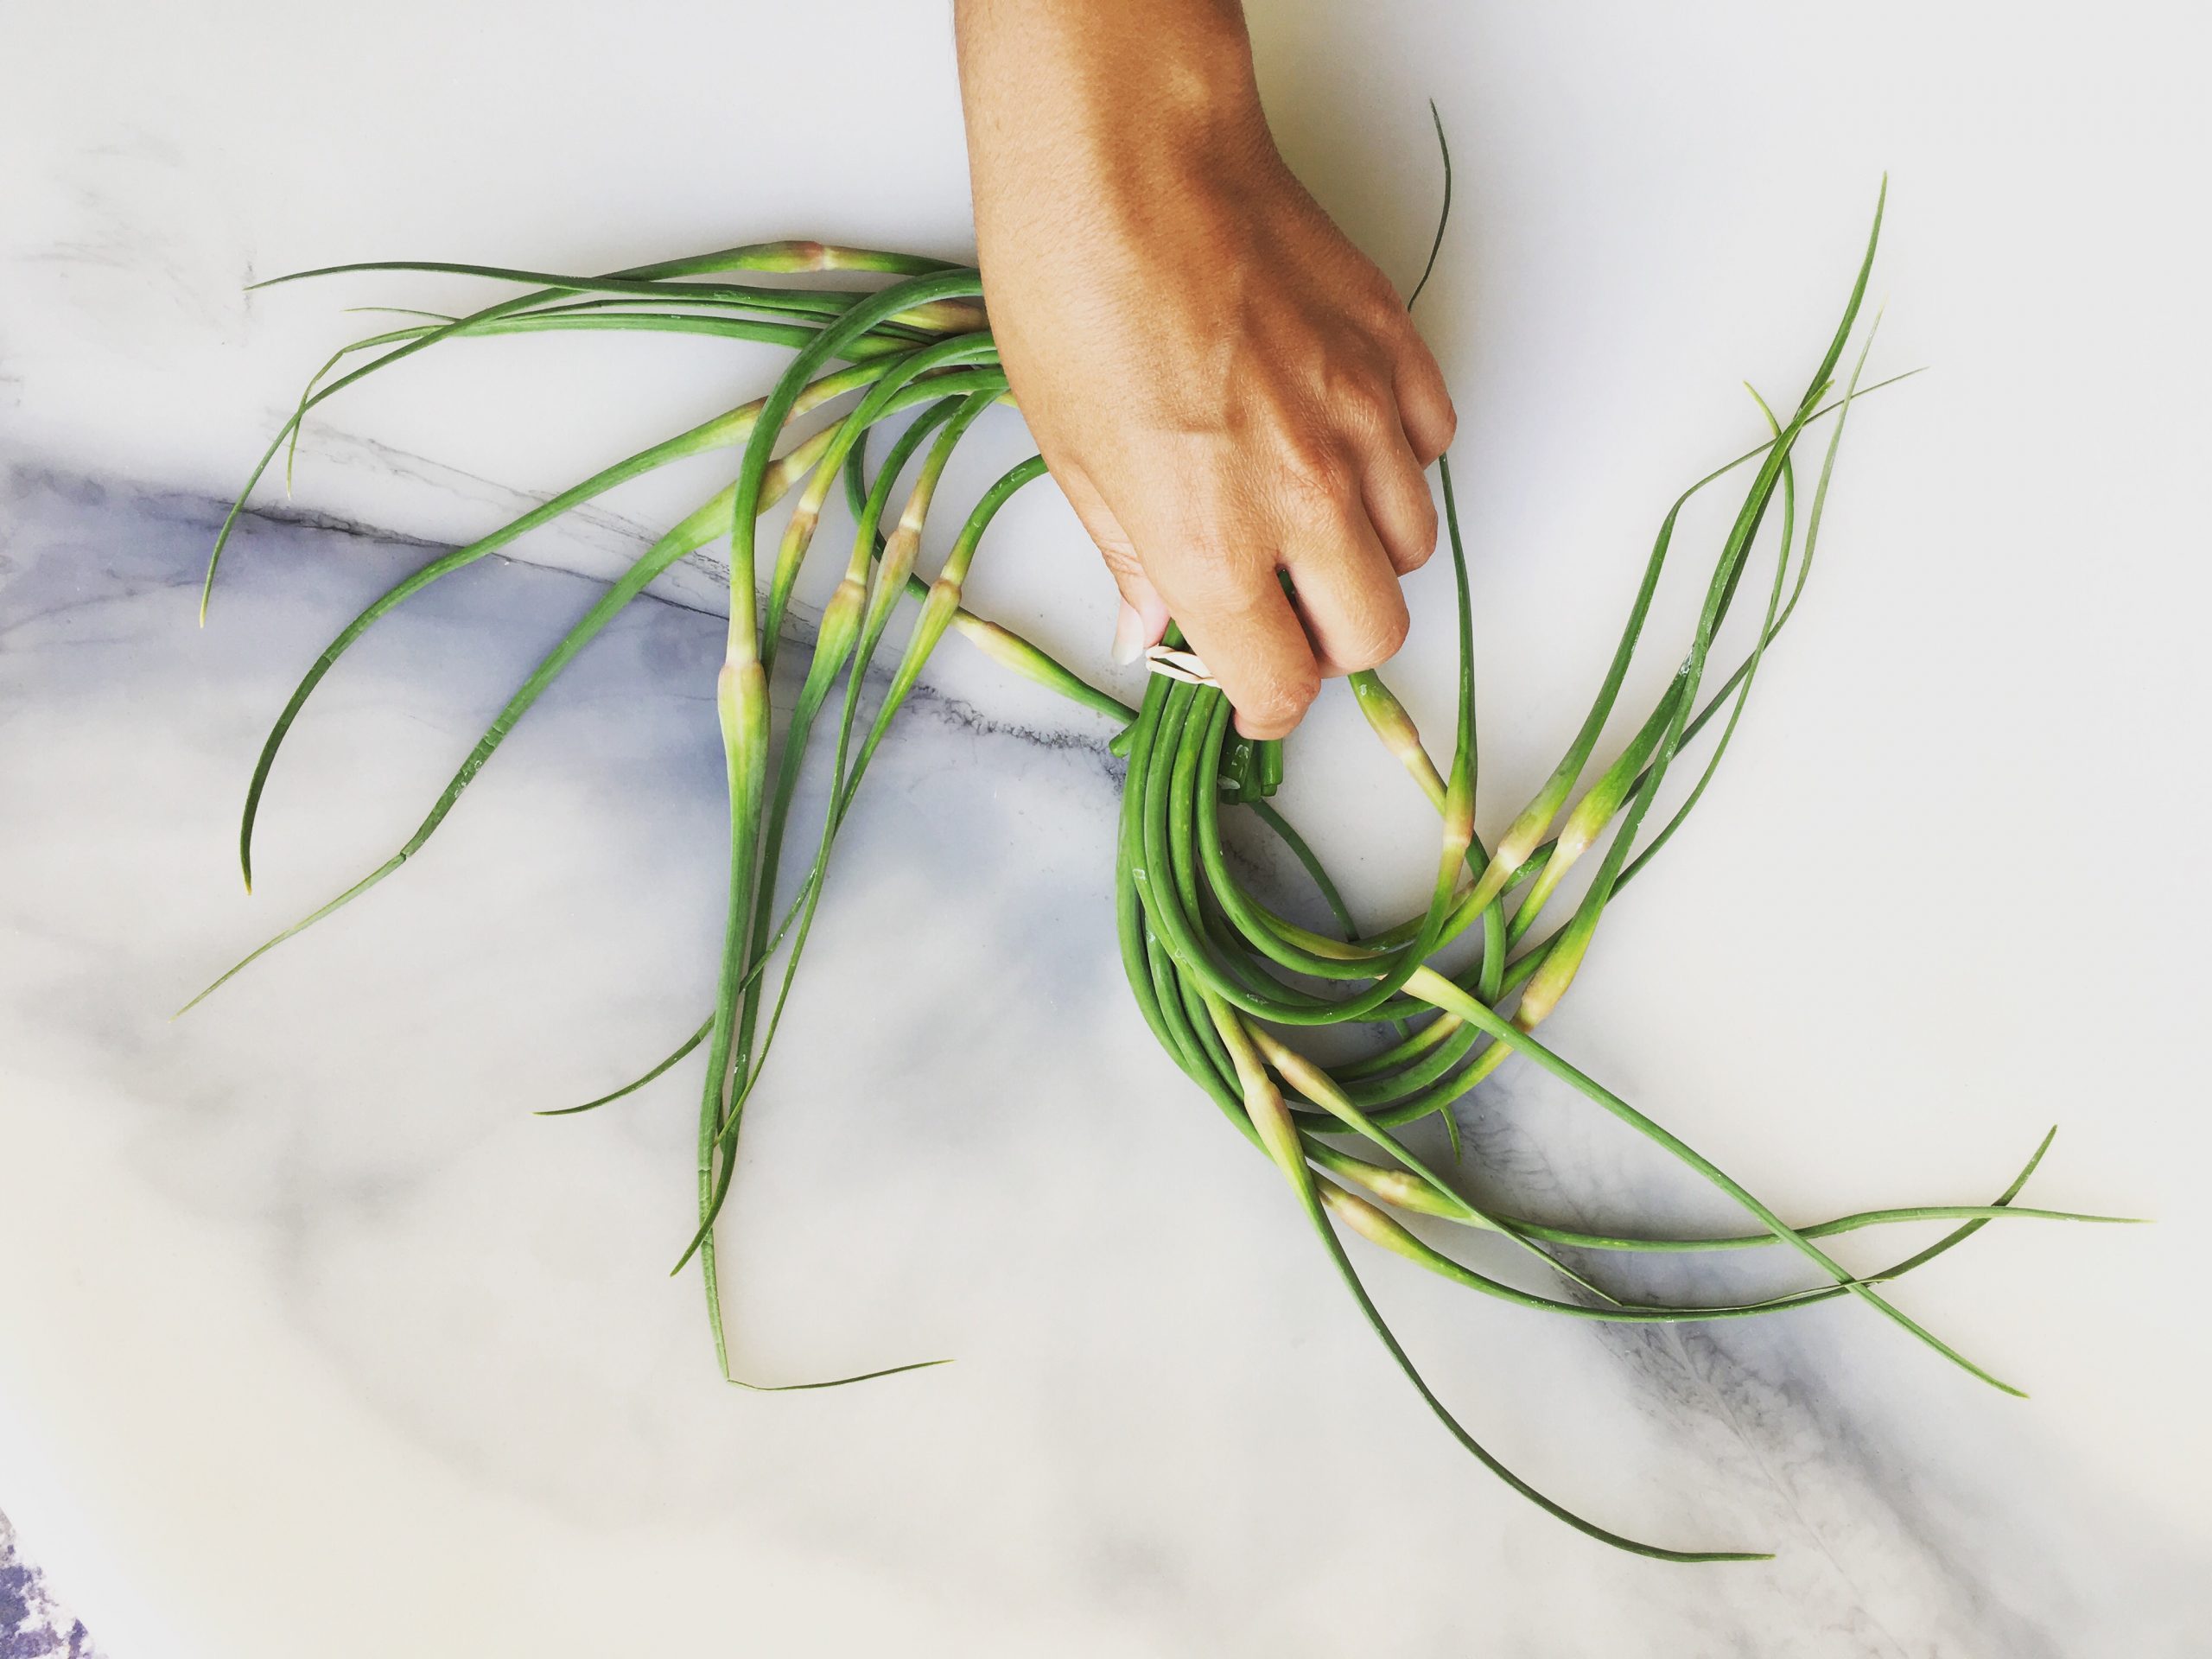
One of the best parts of growing garlic is the garlic scapes, which you will need to remove come June to let the plant continue to grow successfully.
As soon as the escapes emerge — cut them off.
Some people opt to leave the garlic scapes on to grow larger, but the fact of the matter is that the longer you leave your garlic scapes to grow — the smaller the resulting garlic bulbs under the ground will be.
If you have never had garlic scapes before, you are in for a gourmet treat that is very simple to prepare.
If you were to leave the scapes on, they would develop into small garlic bulbils, which are true garlic seed. You can actually plant these bulbils and grow garlic from seed, but by doing this, the plant will not put its energy into growing large bulbs below the ground.
The bulbs would instead be considerably smaller and harder to work with in the kitchen.
It’s best to harvest the scapes, make garlic scape pesto, steam or sauté them, and serve with butter and sea salt.
I love scapes served as a side dish to a nice butter-basted prime rib steak.
Harvesting Your Garlic
Come July or August, depending on your location, you will harvest your garlic.
Grab it firmly and pull it right out. If it’s stuck or the stem breaks, gently dig it out instead.
Do not wash the garlic or cut or bruise the bulbs.
Instead, gently dislodge them from the soil and brush off as much dirt as possible.
Harvest the garlic when the soil is dry if possible; it is much less messy that way than if the soil is wet and sticky.
Curing Your Garlic
After harvesting, make sure you do not remove the leaves or cut off the roots.
Now, you can hang the garlic or spread it out to dry in a well-ventilated and dry place. Keep the garlic out of direct sunlight.
Your kitchen might be perfect for this.
Garlic takes approximately 2 weeks to cure but if you are in a humid climate, it may take longer.
You will know it’s ready because the outer papery use will be dry to the touch, and the tops will be completely brown.
Now you can cut the bulbs out whole and store them.
Storing Your Garlic All Year
Garlic should be stored somewhere relatively dry, cool, and out of direct sunlight. Your cellar might be too humid depending on your location but a cold room may be just right.
We like to hang our garlic in the kitchen out of direct sunlight and within easy reach alongside dried peppers and other herbs.
FAQ
When planting garlic in the fall, make sure to water it well to help settle the soil around the cloves. This will provide moisture for the garlic as it establishes roots before winter. Throughout the fall and early winter, keep the soil slightly damp but not waterlogged to ensure healthy growth. Remember to water regularly to help the garlic thrive.
Repeatedly planting garlic in the same location can lead to a buildup of soilborne diseases and pests that specifically affect garlic, which can reduce yields and overall plant health. Crop rotation is a recommended practice to minimize these issues. Rotate garlic to a different area of your garden or vegetable plot each year to help maintain soil health and prevent the buildup of garlic-specific problems.
Garlic bulbs typically need a period of cold temperatures, known as vernalization, before planting. This cold period helps stimulate the bulb’s internal development and is essential for garlic to form cloves and produce a good crop.
For most garlic varieties, you should aim to provide them with about 4 to 6 weeks of cold temperatures with average lows of 32 to 50 degrees Fahrenheit (0 to 10 degrees Celsius) before planting. This can be achieved by storing the garlic bulbs in a cool location (around 40°F or 4°C) for a few weeks before planting.
You can plant garlic in the spring but do not expect garlic bulbs and cloves. When planting garlic in the spring, you typically select specific “spring garlic” or “green garlic” varieties. These varieties are bred for spring planting and have shorter growing seasons. They are harvested before the bulbs fully mature, often for their tender green tops and scapes rather than mature bulbs. Spring garlic is milder in flavor compared to fully matured garlic bulbs and is often used in culinary dishes like salads and stir-fries.
Compost is one of the best fertilizers for garlic. Compost enriches the soil with essential nutrients, improves its structure, and enhances moisture retention, all of which are beneficial for healthy garlic growth. Organic matter from compost slowly releases nutrients, promoting steady and robust garlic development throughout the growing season.
The best mulch for garlic is organic and serves to maintain soil moisture, regulate temperature, suppress weeds, and protect garlic bulbs. Popular options include straw, leaves, grass clippings, and wood chips. Apply a 2 to 4-inch layer of your chosen mulch, ensuring you don’t bury the garlic cloves too deeply. See the benefits of mulch for more information.
Final Thoughts
Planting garlic in the fall is an easy and straightforward process. Although garlic will take an astounding 9 months or so to grow underground, it is a hands-off crop that grows well and can basically be forgotten once planted. Light watering come spring is all that is needed to ensure a successful harvest.
When you harvest your garlic, make sure to make my delicious garlic soup with it!

Planting Garlic in the Fall for a Bountiful Harvest
Instructions
- Soil PreparationGarlic thrives in well-drained soil rich in organic matter. To create an ideal growing environment, consider incorporating compost into your soil. This addition not only boosts fertility but also enhances soil structure, providing the perfect foundation for garlic growth.
- Selecting Garlic BulbsChoose healthy, disease-free garlic bulbs for planting. You can source bulbs from a garden center or use those saved from a previous harvest. Some gardeners reserve half of their harvest each year to replant, perpetuating their garlic stock.
- Planting Garlic ClovesPlant garlic cloves individually with the pointed end facing upward. A depth of 1 to 2 inches is ideal, with cloves spaced 4 to 6 inches apart within rows and rows spaced 12 inches apart. This arrangement ensures adequate space for growth.
- Mulching and Winter ProtectionTo shield garlic from winter's chill, apply a layer of mulch such as straw, hay, or leaves. Mulch acts as insulation, safeguarding the soil and preventing extreme temperature fluctuations. Some gardeners even use compost as their mulch layer followed by additional organic materials.
- Establishing Garlic RootsWater newly planted garlic cloves thoroughly to settle the soil around them. During the fall, garlic will establish roots, ready to go dormant over the winter.
- Spring Growth and MaintenanceAs temperatures rise in spring, garlic will begin to grow. Ensure consistent moisture and be vigilant for signs of pests or diseases. Garlic is typically ready for harvest when its lower leaves turn brown, usually in late spring or early summer.
- Harvesting Garlic ScapesThese curly, green shoots appear in early summer and need to be removed to allow the garlic bulbs to grow to their full potential. As soon as the scapes emerge, typically in June, cut them off about an inch above the bulb. While some gardeners choose to leave the scapes to grow larger, doing so may result in smaller garlic bulbs underground.