How To Grow Asparagus From Crowns (Complete Guide)
Asparagus is a perennial vegetable that can be grown easily. Once planted, it can produce delicious asparagus spears every spring for 15 to 20 years or even longer.
The most efficient way to grow asparagus is from crowns, allowing you to harvest the spears earlier. If you need help with growing asparagus, don’t worry. This comprehensive guide will assist you in selecting the perfect site, planting the crowns, properly harvesting them, and maintaining your asparagus patch throughout the seasons and years.
How To Grow Asparagus: Seeds Versus Crowns

Save This Page
If you plant asparagus seeds, it will be three years before you can begin to harvest asparagus spears lightly.
When growing asparagus from crowns, and depending on the variety, you can begin harvesting lightly in the second year.
Seeds are significantly cheaper than crowns, but if you’re an asparagus lover, buying asparagus can add up. If you can harvest an entire year earlier by planting crowns, you may break even or save money.
Both seeds and crowns are easy to grow, but seeds require more input and time. Seeds must be started indoors under grow lights and can only be transplanted when they are 10-12 weeks old after a period of hardening off.
Crowns can be plopped right into the ground before the last frost.
However, the most significant advantage of growing asparagus from crowns remains the time saved — an entire year.
If you wish to start from seeds, my article on planting asparagus seeds thoroughly covers you.
If you’re still in the early planning stages, knowing how many asparagus plants per person is a great resource, too.
Understanding Asparagus Crowns

Asparagus crowns are the root systems of asparagus plants that are typically one to two years old. They are the mature, perennial part of the asparagus plant from which the edible spears grow each season.
The asparagus crowns you buy will consist of a central, woody rhizome, the root system’s main stem. Multiple fleshy roots extend outward from this rhizome. Above the rhizome, you’ll usually find dormant buds; when planted and as the growing season begins, these buds will sprout into the new year’s asparagus spears.
There are 1-year-old and 2-year-old asparagus crowns available to purchase.
One-year-old crowns are known for faster establishment. They’re less likely to have gone through transplant shock or root damage. These younger crowns adapt more readily to new soil conditions, as they haven’t been in a different environment for long. They’re also more widely available in nurseries.
While they might take longer to reach total production than two-year-old crowns, this difference is typically slight.
Two-year-old crowns may allow for an earlier harvest. These older crowns have larger and more developed root systems, leading to quicker spear production initially. However, they also have a higher risk of stress from handling and transplanting.
Selecting Asparagus Crowns For The Home Garden
There are multiple varieties of asparagus you can grow.
Some are very adaptable to the cold and can be harvested in the second year, such as the all-male Guelph Millennium Crowns, which were developed at Guelph University in Ontario, Canada. This variety is one of the best choices for Canadian and Northern American asparagus growers because it is adaptable to extreme cold and temperature fluctuations.
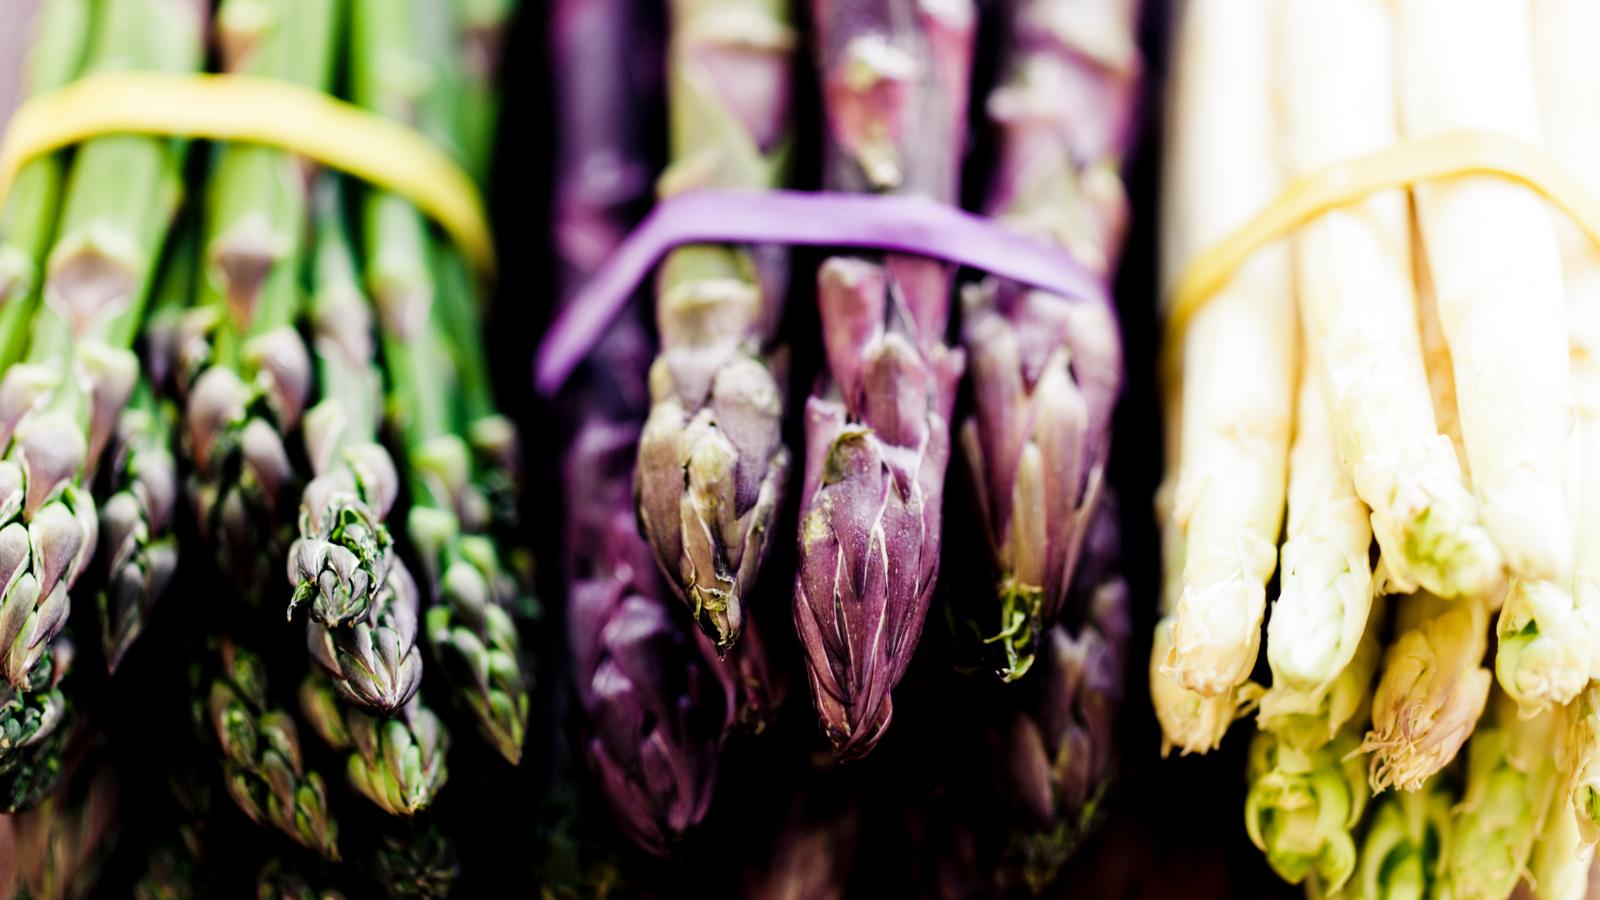
Then there are the milder and sweeter-tasting purple and white asparagus crowns, which are very popular in Europe and are known as spargel.
When selecting the right asparagus variety for your home garden, consider your local climate and soil type.
Varieties like Jersey Knight are often recommended for their disease resistance and adaptability to different environments. Your choice of variety also depends on your preference for spear size and quality; some varieties produce thicker spears, while others offer slender ones.
When choosing healthy asparagus crowns at a nursery, look for crowns with firm, fleshy roots, avoiding any that appear dry, shriveled, or show signs of rot or mold.
A well-developed root system is a good indicator of a healthy crown.
Check for plump, intact buds, as damaged buds can affect growth.
Larger crowns are generally older and might lead to quicker spear production, but ensure they haven’t been stored out of the soil for too long.
Purchasing from a reputable nursery or garden center is advisable, so don’t hesitate to ask the staff about the crowns’ origins and care instructions. This ensures you get the best start for your asparagus garden.
A quick note on male and female asparagus: It’s worth noting that female asparagus plants will produce seeds, whereas males won’t. These seeds can be found on the ferns after harvesting. However, it’s important to remember that these plants are self-seeding, which can lead to overcrowding in your asparagus bed and competition for nutrients, resulting in poor growth. To avoid this, many gardeners remove the female crowns entirely or opt for all-male varieties, as mentioned above.
Site Selection & Preparation of Your Asparagus Bed

Your asparagus bed will be in production for potentially over 20 years — choose the location wisely.
Another important consideration is the ferns, which will start to grow after harvesting and reach 3 feet in height. Make sure the ferns do not shade anything else that requires sunlight.
Asparagus plants thrive in well-drained soil and require full sun exposure for optimal growth. Proper bed preparation lays the foundation for healthy plants and bountiful harvests in the years to come.
- Ensure Good Drainage and Sunlight: Asparagus needs full sun, meaning at least 6-8 hours of direct sunlight daily. Select a site that meets this requirement. The soil should be well-drained to prevent waterlogging, which can lead to root rot. If drainage is a concern, consider choosing a raised bed.
- Soil Testing and pH Adjustment: This is not strictly necessary unless you suspect acidic soils. Before planting, test the soil pH. Asparagus prefers a slightly alkaline to neutral pH, around 6.5 to 7.5. If your soil is too acidic, you can raise the pH by adding lime. Conversely, incorporating sulfur can help lower the pH if the soil is too alkaline. Adjustments should be made based on soil test recommendations.
Prepare The Asparagus Bed For Planting & Take Care of It
Remove any stones, weeds, and debris.
Studies have shown that asparagus thrives in a no-till garden, the holistic system of organic gardening we practice at the homestead.
Dig a trench as described below in the step-by-step planting instructions.
Once your trench has been dug and compost added, it is best to disturb the soil as minimally as possible afterward.
Compost can be added on top each year in the fall.
If you’re working with grass and/or weeds for your asparagus bed site, consider mowing it down and laying down cardboard over the top, followed by a drenching of water and organic matter (finished compost, soil, etc) and then planting.
This cardboard method can prepare your intended asparagus patch for planting the crowns in the fall. As much compost as possible, leaf mold, mulch, etc., can be added.
If the soil is highly compacted or poor quality and you need more compost, you can even plant cover crops like tillage radish to improve the soil.
Read More
- No-Till Gardening {Everything You Need To Know}
- How To Lay Mulch Over Grass {Step-by-Step Guide}
- 7 Methods To Shred Leaves For Mulch, Compost or Leaf Mold
Planting The Asparagus Crowns (Step-by-Step)

Planting asparagus crowns at the right time and with the correct technique is essential for establishing a successful asparagus bed. Here’s how to do it effectively:
- Timing: The ideal time to plant asparagus crowns is early spring, as soon as the soil is workable. Typically, crowns are planted about four weeks before your last average frost date. Depending on your local climate, this period generally falls between March and April. Planting at this time allows the crowns to be established before the growing season.
- If the crowns arrive before you can plant them in your region, plant them in soil in containers and keep them cold until transplant time.
Planting Instructions
- Depth and Spacing: Dig a trench about 6-8 inches deep and 12 inches wide. Space the crowns 12-18 inches apart in the trench. For multiple rows, keep about 3 feet between each row to allow ample room for post-harvest fern growth and air circulation.
- Placement: Carefully place each crown in the trench with the buds facing upwards. Spread the roots out evenly in the trench. It’s important not to damage the delicate buds and roots during this process.
Covering the Crowns:
- After placing the crowns, gently cover them with soil. At this point, the soil should cover the crowns, at most 2-3 inches deep.
- As the spears grow, gradually add more soil to the trench until it is level with the ground surface. This method encourages strong spear growth and protects the developing spears.
Remember, gentle handling and correct placement are essential. The buds should be just below the soil surface, and the roots should be spread out, not bunched up.
This ensures the crowns have the best start for a productive asparagus patch.
Watering Asparagus

Proper watering and care immediately after planting asparagus crowns are pivotal for their successful establishment and growth. Here’s how to approach it:
Watering After Planting:
- Water the bed thoroughly right after planting the crowns. This initial watering helps settle the soil around the crowns and roots, ensuring good contact and removing air pockets.
- Aim for moist, not waterlogged, soil. Overwatering can lead to root rot while underwatering may hinder root establishment.
Watering During the First Growing Season:
- Consistency is vital in the first growing season. Keep the soil consistently moist but not soggy. This usually means watering once or twice a week, depending on soil type and weather conditions. About an inch is ideal, and rainfall should be considered.
- Deep watering is more beneficial than frequent light sprinklings. It encourages deeper root growth, which is vital for the long-term health and productivity of the plants.
Monitoring Soil Moisture:
- Check the soil moisture regularly by gently digging near the crowns. The soil should be moist to a few inches deep.
- Adjust your watering schedule based on rainfall and temperature. Hotter, drier conditions will necessitate more frequent watering.
The initial growing season aims to provide a stable environment for the crowns to develop strong roots.
Mulching Asparagus
Weeds compete with asparagus for nutrients and space, adding an organic mulch can reduce this pressure and take extra work off your hands.
We mulch everywhere and the benefits are numerous, check out my article on the best mulch for asparagus for all of your options and more detailed information.
Companion Planting
Both you and asparagus can benefit from companion planting.
For more information, check out my article on the best companion plants for asparagus.
Fertilization and Soil Management
Adequate fertilization and soil management are essential for the health and productivity of your asparagus plants. Here’s how to approach it, with a focus on both organic and inorganic options:
Organic Fertilization:
- Organic fertilizers, like well-rotted manure or compost (the deep litter system is excellent if you have chickens), are fantastic for asparagus. They add nutrients gradually while improving soil structure and microbial activity.
- Applying about an inch of compost each fall can be sufficient in a no-till garden. This method feeds the soil and plants gradually and naturally without disturbing the soil structure. This is all we do, and I cannot recommend it enough—there is no need for fertilizer beyond compost.
Inorganic Fertilizers:
- If you choose inorganic fertilizers, opt for a balanced fertilizer with an equal nitrogen, phosphorus, and potassium ratio (10-10-10).
- Be cautious with nitrogen-heavy fertilizers, as excessive nitrogen can promote fern growth at the expense of spear production.
Timing of Fertilization:
- The best time to apply fertilizer is in the early spring as the spears emerge. This gives the plants a nutrient boost at the start of their growing season.
- A second application can be made after the harvest season ends to prepare the plants for the following year.
Application Method:
- For organic fertilizers like compost, spread it evenly around the base of the plants, being careful not to disturb the crowns.
- When using inorganic fertilizers, follow the manufacturer’s instructions for application rates. Typically, it involves sprinkling the fertilizer around the plants and lightly working it into the soil, followed by watering to help the nutrients seep into the soil.
Remember, maintaining a balance is the key to successful soil management in an asparagus bed. Whether you choose organic or inorganic methods, the goal is to provide the plants with the nutrients they need while preserving soil health.
In a no-till garden, regular compost can create a rich, sustainable environment for your asparagus plants to thrive while reducing your workload and weed pressures.
Harvesting From Your Asparagus Patch

Patience is a virtue!
Do not be tempted to harvest a single spear during the first year. Instead, let them grow into giant ferns or frons, which will harvest energy and send it back to the roots to develop healthier and more robust plants.
It is crucial to wait until the second year before harvesting the plants to give them time to become established and strong.
During the first harvest, it is recommended to harvest lightly and only cut the fattest spears off at ground level when they are 6-10 inches long over 2-3 weeks.
When thinner spears grow, it is best to let them mature into big fronds to nourish the roots.
Each year, the harvest can be gradually extended, up to a maximum of 6-8 weeks.
Long-Term Maintenance

Consistent long-term maintenance is critical to ensuring your asparagus bed remains productive for many years.
- Cutting Back Ferns in Fall: Asparagus ferns will yellow and die back after the growing season. Cut these ferns to the ground in late fall. This helps prevent disease and pest infestation over winter.
- Applying Winter Mulch: Once the ferns are cut back, apply a thick layer of mulch, such as straw or leaves, to protect the crowns from freezing temperatures and fluctuating winter conditions.
- Weed Control: Keep the asparagus bed weed-free throughout the year. Weeds compete for nutrients and water, reducing the vigor of your asparagus plants.
- Soil Fertility: Add compost or well-rotted manure to the bed, especially in a no-till garden. This practice enriches the soil, maintaining its fertility and structure.
- Regular Monitoring: Check for signs of pests or diseases and address them promptly to avoid significant impact on your plants.
Following these maintenance steps, you can enjoy a productive asparagus bed for 15 to 20 years or even longer.
Common Pests and Diseases

Keeping your asparagus garden healthy involves being vigilant about pests and diseases, which can impact the vitality and yield of your plants.
- Asparagus Beetles: The most common pest for asparagus, these beetles can be controlled by handpicking or using organic insecticides. Regularly inspect your plants for beetles and their larvae, especially during early spring.
- Fusarium Wilt and Crown Rot: These fungal diseases can be prevented by ensuring good drainage and avoiding overwatering. Planting disease-resistant varieties also helps minimize the risk.
- Rust: Asparagus rust appears as reddish-brown lesions on the stems and ferns. Maintaining good air circulation around the plants and keeping the bed weed-free can reduce the likelihood of rust. Infected plants should be removed and destroyed to prevent the spread of the disease.
Final Thoughts

Growing asparagus from crowns offers several advantages. It’s a time-efficient method, allowing you to enjoy homegrown asparagus spears much sooner than starting from seeds. Asparagus, a perennial vegetable, requires minimal annual maintenance once established. With proper care, your patch can produce a bountiful harvest year after year.
Asparagus is an excellent choice if you’ve considered adding more perennials to your vegetable garden. Not only does it yield delicious spears each spring, but it’s also a long-term investment in your garden’s productivity. With the steps outlined in this guide, you’re well-equipped to start your own asparagus patch. The small effort you put in now will reward you with years of fresh, homegrown asparagus.